We've been literally snowed under (zucchinied under?) by summer squash and zucchini from our CSA and farmers market. What to do with it all? There's savory tacos de calabacitas or the standard sweet zucchini bread. But really, there are only so many tacos and so many loaves of bread one can eat.
So I found this, Korean hobakjeon or zucchini pancakes. Think of them as the Korean potato latke. They're so simple...only five ingredients, all of which you'll have in your kitchen. The hobakjeon is delicious with some dipping sauce (I love it with the Trader Joe's soyaki sauce) or on their own sprinkled with salt.
Korean-style hobakjeon (or zucchini pancakes)
Adapted from maangchi.com
1 and 1/2 cups julienned zucchini
1/2 cup flour
1/2 teaspoon salt
freshly ground pepper
1/2 cup water
vegetable oil
In a bowl, add julienned zucchini, flour, water and salt. Add ground pepper to taste. Mix well.
In a large frying pan, heat 2 tablespoons of vegetable oil on medium high heat. Using a spoon, spread zucchini mixture evenly and thinly onto the pan to form a large circular(ish) pancake.
Cook for a few minutes, pressing down gently with the spatula, until the bottom turns light brown and crispy. Using a spatula, flip the pancake to cook the other side. Add a bit more oil if necessary.
When both sides are browned and crispy, transfer pancake onto a dish. Serve on its own, lightly sprinkled with salt, or with soy sauce or dipping sauce.
The adventures and misadventures of a long-time Texan
as she moves her family from Austin to Boston
Showing posts with label CSA. Show all posts
Tuesday, August 2, 2011
Wednesday, July 6, 2011
Garlic scape pesto
This week's CSA box featured:
Garlic scapes.
I'd always wanted to play with these so I was pretty psyched to find them in my box. The girls who were helping offload the veggies into my shopping bag saw some gorgeous beets and started chanting, "Beets! Beets! Beets!"
Because they love beets.
And I thought, "What funny kids I have." I don't think that many other children would summon that kind of enthusiasm for beets. (And just in case you're about to launch into a fugue of mommy guilt, don't. Mine are plenty picky, and turn up their noses at a wide and ever-changing variety of things.)
So pesto. Another quick evening-after-the-pool meal.
Garlic Scape Pesto
From "A Mighty Appetite" by Kim O'Donnell, The Washington Post
1 cup garlic scapes (about 8 or 9 scapes), top flowery part removed, cut into ¼-inch slices
1/3 cup walnuts
¾ cup olive oil
¼-1/2 cup grated parmigiano
½ teaspoon salt
black pepper to taste
Place scapes and walnuts in the bowl of a food processor and whiz until well combined and somewhat smooth. Slowly drizzle in oil and process until integrated. With a rubber spatula, scoop pesto out of bowl and into a mixing bowl. Add parmigiano to taste; add salt and pepper. Makes about 6 ounces of pesto. Keeps for up to one week in an air-tight container in the refrigerator.
For ½ pound short pasta such as penne, add about 2 tablespoons of pesto to cooked pasta and stir until pasta is well coated.
Unlike the dark green of the traditional basic-based pesto, the garlic scape pesto was a fresh and lively spring green. It tasted both garlicky and green. It was delicious, but perhaps a little overwhelming with just noodles. The original article's author suggested scattering some cherry tomatoes on top of the noodles. It made me wish for some tomatoes. Mine are still green on the vine. I wondered about crisping some pancetta and adding some peas to this dish.
This pesto would make a fabulous and conversation-starting hors d'oeuvres, mounded atop some crostini and with fresh mozzarella or perhaps a sliver of prosciutto or half a cherry tomato...or...You could really have some fun with this.
Garlic scapes.
I'd always wanted to play with these so I was pretty psyched to find them in my box. The girls who were helping offload the veggies into my shopping bag saw some gorgeous beets and started chanting, "Beets! Beets! Beets!"
Because they love beets.
And I thought, "What funny kids I have." I don't think that many other children would summon that kind of enthusiasm for beets. (And just in case you're about to launch into a fugue of mommy guilt, don't. Mine are plenty picky, and turn up their noses at a wide and ever-changing variety of things.)
So pesto. Another quick evening-after-the-pool meal.
Garlic Scape Pesto
From "A Mighty Appetite" by Kim O'Donnell, The Washington Post
1 cup garlic scapes (about 8 or 9 scapes), top flowery part removed, cut into ¼-inch slices
1/3 cup walnuts
¾ cup olive oil
¼-1/2 cup grated parmigiano
½ teaspoon salt
black pepper to taste
Place scapes and walnuts in the bowl of a food processor and whiz until well combined and somewhat smooth. Slowly drizzle in oil and process until integrated. With a rubber spatula, scoop pesto out of bowl and into a mixing bowl. Add parmigiano to taste; add salt and pepper. Makes about 6 ounces of pesto. Keeps for up to one week in an air-tight container in the refrigerator.
For ½ pound short pasta such as penne, add about 2 tablespoons of pesto to cooked pasta and stir until pasta is well coated.
Unlike the dark green of the traditional basic-based pesto, the garlic scape pesto was a fresh and lively spring green. It tasted both garlicky and green. It was delicious, but perhaps a little overwhelming with just noodles. The original article's author suggested scattering some cherry tomatoes on top of the noodles. It made me wish for some tomatoes. Mine are still green on the vine. I wondered about crisping some pancetta and adding some peas to this dish.
This pesto would make a fabulous and conversation-starting hors d'oeuvres, mounded atop some crostini and with fresh mozzarella or perhaps a sliver of prosciutto or half a cherry tomato...or...You could really have some fun with this.
Sunday, June 26, 2011
Soba noodle salad with ginger and mizuna
Greetings from the Bluebonnet sickbed. Not exactly a primo summer vacation destination. However, to make up for the lack of surf and tropical drinks, we have plenty of iced water and Nyquil. After battling this wicked stubborn cold for weeks, here I sit, unable to launch into summer vacation festivities with the kids. Total and absolute bummer.
Guest chef Will took pity on me and whipped up a fresh, cool, gingery dish that soothes my sinuses. This soba dish incorporates those dark green leafy vegetables (mizuna, in this case) that's supposed to be an amazing source of vitamins, folate, carotenoids, and other goodies that keep us healthy. I'm in dire need of healthy these days. I think I'm personally responsible for deforesting half of the continental USA with my kleenex usage. By the way, if you don't have any mizuna, you can substitute watercress.
Soba noodle salad with ginger and mizuna
1 large bunch mizuna, washed, stemmed, and chopped
1 large carrot or 2 small carrots, sliced diagonally into thin slices
1/2 hothouse cucumber, cored and sliced into matchsticks
6 ounces dried soba noodles
2 teaspoons fresh ginger, peeled and diced fine
1 garlic clove, minced
1 tablespoon sesame oil
2 tablespoons soy sauce
1 teaspoon rice wine vinegar
1 teaspoon sugar
1 tablespoon sesame seeds
Cook soba noodles per directions in boiling water. Drain and rinse with cool water until they are no longer hot.
In a large bowl, combine mizuna, carrot slices, soba noodles, and cucumber.
In a small bowl, whisk together ginger, garlic, sesame oil, soy sauce, vinegar,
and sugar. Pour over salad and toss. Sprinkle with sesame seeds and serve.
Guest chef Will took pity on me and whipped up a fresh, cool, gingery dish that soothes my sinuses. This soba dish incorporates those dark green leafy vegetables (mizuna, in this case) that's supposed to be an amazing source of vitamins, folate, carotenoids, and other goodies that keep us healthy. I'm in dire need of healthy these days. I think I'm personally responsible for deforesting half of the continental USA with my kleenex usage. By the way, if you don't have any mizuna, you can substitute watercress.
Soba noodle salad with ginger and mizuna
1 large bunch mizuna, washed, stemmed, and chopped
1 large carrot or 2 small carrots, sliced diagonally into thin slices
1/2 hothouse cucumber, cored and sliced into matchsticks
6 ounces dried soba noodles
2 teaspoons fresh ginger, peeled and diced fine
1 garlic clove, minced
1 tablespoon sesame oil
2 tablespoons soy sauce
1 teaspoon rice wine vinegar
1 teaspoon sugar
1 tablespoon sesame seeds
Cook soba noodles per directions in boiling water. Drain and rinse with cool water until they are no longer hot.
In a large bowl, combine mizuna, carrot slices, soba noodles, and cucumber.
In a small bowl, whisk together ginger, garlic, sesame oil, soy sauce, vinegar,
and sugar. Pour over salad and toss. Sprinkle with sesame seeds and serve.
Wednesday, June 22, 2011
Tacos de calabacitas
After yesterday's haywire contortions, it's nice to return to something simpler, earthier. This recipe takes the best of your summer garden, tomatoes, zucchini, summer squash, and transforms them into fresh, rich, delectable vegetarian tacos. They're simple enough for an everyday dinner and special enough for company. This one is headed straight for our summer menu rotation.
Tacos de calabacitas
Adapted from a recipe by Julian Medina, chef and owner of Tolache in Manhattan, and printed in the June 21, 2010 issue of The New York Times
Yield 4 servings
Time 30 minutes
2 tablespoons extra-virgin olive oil
2 tablespoons minced onion
1/2 cup diced yellow summer squash
1/2 cup diced zucchini
1/2 cup corn kernels, preferably fresh (we used frozen)
1 jalapeño, stemmed, seeded and finely chopped
1/2 cup diced tomato or quartered cherry tomatoes
1/4 teaspoon dried oregano
dash cumin
salt
1/2 cup Monterey Jack cheese, grated
8 corn tortillas
1 tablespoon minced cilantro (optional)
In a medium saucepan over medium heat, heat the oil until shimmering. Add onion and sauté until translucent, about 2 minutes. Add squash, zucchini, corn kernels and jalapeno. Sauté until squash and zucchini are lightly browned, about 3 minutes. Add tomatoes, oregano, cumin, and salt to taste.
Cover, reduce heat to medium-low, and cook, stirring once or twice, until squash, zucchini and tomatoes release their juices and begin to blend, 5 to 7 minutes. Uncover, and adjust salt as needed. Sprinkle with cheese, cover, and cook until cheese is melted, about 1 minute. Remove from heat and keep warm.
Preheat a griddle or large heavy skillet over medium heat. Working in batches, warm the tortillas on the griddle, about one minute a side. Place the warmed tortillas on a platter and cover with foil to keep warm.
Arrange two warm tortillas on each of four plates. Place equal portions of filling in the center of each tortilla. Garnish with a sprinkling of cilantro, and serve.
Tacos de calabacitas
Adapted from a recipe by Julian Medina, chef and owner of Tolache in Manhattan, and printed in the June 21, 2010 issue of The New York Times
Yield 4 servings
Time 30 minutes
2 tablespoons extra-virgin olive oil
2 tablespoons minced onion
1/2 cup diced yellow summer squash
1/2 cup diced zucchini
1/2 cup corn kernels, preferably fresh (we used frozen)
1 jalapeño, stemmed, seeded and finely chopped
1/2 cup diced tomato or quartered cherry tomatoes
1/4 teaspoon dried oregano
dash cumin
salt
1/2 cup Monterey Jack cheese, grated
8 corn tortillas
1 tablespoon minced cilantro (optional)
In a medium saucepan over medium heat, heat the oil until shimmering. Add onion and sauté until translucent, about 2 minutes. Add squash, zucchini, corn kernels and jalapeno. Sauté until squash and zucchini are lightly browned, about 3 minutes. Add tomatoes, oregano, cumin, and salt to taste.
Cover, reduce heat to medium-low, and cook, stirring once or twice, until squash, zucchini and tomatoes release their juices and begin to blend, 5 to 7 minutes. Uncover, and adjust salt as needed. Sprinkle with cheese, cover, and cook until cheese is melted, about 1 minute. Remove from heat and keep warm.
Preheat a griddle or large heavy skillet over medium heat. Working in batches, warm the tortillas on the griddle, about one minute a side. Place the warmed tortillas on a platter and cover with foil to keep warm.
Arrange two warm tortillas on each of four plates. Place equal portions of filling in the center of each tortilla. Garnish with a sprinkling of cilantro, and serve.
Wednesday, June 15, 2011
Vanilla rhubarb soda or rhubarb bellini or...
I love this. It embodies the very best of what I love about cooking and food.
Simplicity. Taste. Versatility.
What am I talking about? Rhubarb syrup. You can't get any simpler than this. Best of all, you use every bit. After cooking down the rhubarb, use the syrup for making amazing vanilla rhubarb soda or bellinis. You can use the pulp as jam or ice cream topping. If you haven't already made something like this, you're going to swoon. Promise.
By the way, I have a shameful admission for a self-professed foodie. This is my first rhubarb encounter. Before it showed up in my CSA box, I don't think I'd recognize rhubarb if you'd bopped me on the head with it. Of course, I'd had it in pie, usually of the strawberry rhubarb variety. But by then, it had been cooked down into indistinguishable lumps. Did you know that rhubarb looks like beautifully rosy celery? Who knew?
Simple rhubarb syrup
Adapted from the kitchn and The New York Times
4 cups rhubarb, chopped crosswise into thin slices
1 cup sugar
1 cup water
approx. 1/4 vanilla pod, sliced lengthwise
Combine rhubarb, sugar, water, and vanilla pod into saucepot. Bring to a boil. Cover and turn down to a simmer for about 20 minutes, stirring occasionally, until the rhubarb has broken down and the liquid has thickened.
Let cool. Strain through a fine-meshed sieve or cheesecloth. Refrigerate pulp and syrup separately. Use within one week.
This turned out to be very sweet. Syrupy sweet, in fact. Next time, I might dial back the sugar just a bit. Then again, it was syrupy perfection.
The pulp wasn't very photogenic, but made an amazing topping for a buttered multigrain English muffin. An easy, delicious start to the day.
Add 1 part rhubarb syrup to 4 parts sparkling water for an all-natural, unusual, delicious soda. The girls both gave it two thumbs up. I don't remember how they pulled off this contortionist feat while guzzling the soda down as fast as possible.
And if you're feeling a bit more celebratory (or have a more adult audience), mix 1 part rhubarb syrup to 4 parts prosecco. One sip immediately flung me back to my college days, downing bellinis with friends at Birraporetti's. This rhubarb bellini is even better.
The possibilities for rhubarb syrup cocktails are endless. Next on my to-try list might be rhubarb whiskey sours. Or these rhubarb mojitos. Cheers!
Simplicity. Taste. Versatility.
What am I talking about? Rhubarb syrup. You can't get any simpler than this. Best of all, you use every bit. After cooking down the rhubarb, use the syrup for making amazing vanilla rhubarb soda or bellinis. You can use the pulp as jam or ice cream topping. If you haven't already made something like this, you're going to swoon. Promise.
By the way, I have a shameful admission for a self-professed foodie. This is my first rhubarb encounter. Before it showed up in my CSA box, I don't think I'd recognize rhubarb if you'd bopped me on the head with it. Of course, I'd had it in pie, usually of the strawberry rhubarb variety. But by then, it had been cooked down into indistinguishable lumps. Did you know that rhubarb looks like beautifully rosy celery? Who knew?
Simple rhubarb syrup
Adapted from the kitchn and The New York Times
4 cups rhubarb, chopped crosswise into thin slices
1 cup sugar
1 cup water
approx. 1/4 vanilla pod, sliced lengthwise
Combine rhubarb, sugar, water, and vanilla pod into saucepot. Bring to a boil. Cover and turn down to a simmer for about 20 minutes, stirring occasionally, until the rhubarb has broken down and the liquid has thickened.
Let cool. Strain through a fine-meshed sieve or cheesecloth. Refrigerate pulp and syrup separately. Use within one week.
This turned out to be very sweet. Syrupy sweet, in fact. Next time, I might dial back the sugar just a bit. Then again, it was syrupy perfection.
The pulp wasn't very photogenic, but made an amazing topping for a buttered multigrain English muffin. An easy, delicious start to the day.
Add 1 part rhubarb syrup to 4 parts sparkling water for an all-natural, unusual, delicious soda. The girls both gave it two thumbs up. I don't remember how they pulled off this contortionist feat while guzzling the soda down as fast as possible.
And if you're feeling a bit more celebratory (or have a more adult audience), mix 1 part rhubarb syrup to 4 parts prosecco. One sip immediately flung me back to my college days, downing bellinis with friends at Birraporetti's. This rhubarb bellini is even better.
The possibilities for rhubarb syrup cocktails are endless. Next on my to-try list might be rhubarb whiskey sours. Or these rhubarb mojitos. Cheers!
Wednesday, June 8, 2011
Scrambled eggs with chive flowers
This week's CSA (Community Supported Agriculture) box had another generous bundle of flowering chives. Finally! A chance to taste them.
I sautéed them in a little salted butter and sprinkled them on scrambled eggs. They were absolutely delicious, tasting delicately of chives. I'd steeled myself for bitterness, but to my surprise, they were not bitter. Unfortunately, the sautéing process softened the blossoms and rendered them not-so-photogenic. Next time I think I'll try the flowers raw or maybe sauté them very lightly. That would make a much prettier presentation.
So be brave and try your chive flowers! In the immortal words of Willy Wonka, "Everything inside is eatable. I mean edible. I mean you can eat everything!" (By the way, these were just regular old chives and not Chinese or garlic chives which have white flowers.)
I sautéed them in a little salted butter and sprinkled them on scrambled eggs. They were absolutely delicious, tasting delicately of chives. I'd steeled myself for bitterness, but to my surprise, they were not bitter. Unfortunately, the sautéing process softened the blossoms and rendered them not-so-photogenic. Next time I think I'll try the flowers raw or maybe sauté them very lightly. That would make a much prettier presentation.
So be brave and try your chive flowers! In the immortal words of Willy Wonka, "Everything inside is eatable. I mean edible. I mean you can eat everything!" (By the way, these were just regular old chives and not Chinese or garlic chives which have white flowers.)
Thursday, April 28, 2011
This is not a recipe
Ceci n'est pas une pipe.
My apologies to Magritte. Okay. Seriously.
Today's post is not a recipe. It's more of an...assemblage? Yes, this is that. You've had those evenings too, right? Staring into the depths of your fridge waiting for inspiration to strike. Or a frozen pizza. Whichever strikes first. Tonight's dinner was an assemblage made of chapati (Costco impulse), boneless turkey breast (Whole Foods sale), and some veggies (CSA). Add some pesto from a local restaurant (I know some of you green-thumb folks have last summer's pesto frozen), and you have...cultural confusion. Or in other words...
Pesto flatbread pizza with turkey and balsamic vegetables
6 pre-made chapati
Boneless turkey breast (or substitute chicken breast or cutlets)
1 large summer squash, cut once lengthwise and then sliced into half-rounds
1/2 sweet onion, diced
3 cloves garlic, minced
Fresh tomatoes, roughly chopped
Fresh mozzarella, roughly chopped, or shredded mozzarella
Pre-made pesto
Olive oil
1 teaspoon of balsamic vinegar
Salt and freshly ground black pepper to taste
Preheat the oven to 400ºF.
Slice the turkey breast vertically across the grain into slices about 1/2" wide. Sprinkle with salt and pepper. Pour a bit of olive oil into a frying pan. Add garlic and sauté briefly. Add the turkey slices and cook until done. Remove from heat and cut into thin strips.
In another pan, add a bit of olive oil. Sauté onion until it starts to caramelize. Add summer squash. Cook until soft. Drizzle with approximately 1 teaspoon of balsamic vinegar.
In a sauté pan (cast iron works well), heat the chapati until lightly brown on both sides (per package instructions).
Place chapati on a cookie sheet. Slather a base layer of pesto onto the chapati. Add other ingredients (turkey, balsamic vegetables, tomatoes). Top with mozzarella. Pop into the oven for about 5 minutes or until the cheese is melted.
If you're curious about how to make your own chapati, here's Mark Bittman's take.
My apologies to Magritte. Okay. Seriously.
Today's post is not a recipe. It's more of an...assemblage? Yes, this is that. You've had those evenings too, right? Staring into the depths of your fridge waiting for inspiration to strike. Or a frozen pizza. Whichever strikes first. Tonight's dinner was an assemblage made of chapati (Costco impulse), boneless turkey breast (Whole Foods sale), and some veggies (CSA). Add some pesto from a local restaurant (I know some of you green-thumb folks have last summer's pesto frozen), and you have...cultural confusion. Or in other words...
Pesto flatbread pizza with turkey and balsamic vegetables
6 pre-made chapati
Boneless turkey breast (or substitute chicken breast or cutlets)
1 large summer squash, cut once lengthwise and then sliced into half-rounds
1/2 sweet onion, diced
3 cloves garlic, minced
Fresh tomatoes, roughly chopped
Fresh mozzarella, roughly chopped, or shredded mozzarella
Pre-made pesto
Olive oil
1 teaspoon of balsamic vinegar
Salt and freshly ground black pepper to taste
Preheat the oven to 400ºF.
Slice the turkey breast vertically across the grain into slices about 1/2" wide. Sprinkle with salt and pepper. Pour a bit of olive oil into a frying pan. Add garlic and sauté briefly. Add the turkey slices and cook until done. Remove from heat and cut into thin strips.
In another pan, add a bit of olive oil. Sauté onion until it starts to caramelize. Add summer squash. Cook until soft. Drizzle with approximately 1 teaspoon of balsamic vinegar.
In a sauté pan (cast iron works well), heat the chapati until lightly brown on both sides (per package instructions).
Place chapati on a cookie sheet. Slather a base layer of pesto onto the chapati. Add other ingredients (turkey, balsamic vegetables, tomatoes). Top with mozzarella. Pop into the oven for about 5 minutes or until the cheese is melted.
If you're curious about how to make your own chapati, here's Mark Bittman's take.
Monday, April 18, 2011
Baked kale chips
I have a wee confession to make.
Kale is one of those vegetables that I walk past in the grocery store. No eye contact. No howdy-do. Nuthin'. I head for the broccoli (possibly the broccoli rabe if I'm feeling adventurous), the onions, the asparagus, the spinach (sometimes the bok choy). I'm not even sure that "kale" was in my vegetable lexicon.
But when kale showed up in my CSA box, I was super excited. (Yeah...I know...kale excites me. I must lead a sad sort of life...) I'd wanted to make kale chips ever since a friend posted about them on Facebook. A green leafy vegetable that preschool children devour? That's crispy and light and snack-a-licious? There must be some sort of catch, right?
Let's find out.
(On the plus side, the beautifully ruffled kale that I received proved to be quite photogenic. Intricate and organic.)
I was a bit surprised when I washed the kale. The leaves felt rubbery, not delicate like lettuce. They felt more like cabbage. I was growing ever more dubious about the kale chips.
The verdict? I need not have worried. They were light, crispy, salty perfection. Exactly as advertised. Best of all, Pretzel Boy ate a few kale chips. He then ate a few Cape Cod potato chips and mused, "How can they taste the same? One's a leaf, and one's a potato." If the pickiest of the picky will eat these chips, I'm officially calling this one a winner.
Baked kale chips
Seen on epicurious.com and smitten kitchen
1 bunch kale (approximately 12 leaves)
1 tablespoon olive oil
salt and pepper to taste
Preheat oven to 275ºF. Wash and dry kale. Cut away stalk and center rib, and cut into large pieces. Toss with olive oil, salt, and pepper. (Hint: Use much less salt than you think you need. My first batch was much too salty.)
Place in a single layer on parchment paper-covered baking sheet. Bake for 25 minutes or until crispy. Place on rack to cool.
(For a delicious variation, add a pinch of paprika and garlic powder before baking.)
Kale is one of those vegetables that I walk past in the grocery store. No eye contact. No howdy-do. Nuthin'. I head for the broccoli (possibly the broccoli rabe if I'm feeling adventurous), the onions, the asparagus, the spinach (sometimes the bok choy). I'm not even sure that "kale" was in my vegetable lexicon.
But when kale showed up in my CSA box, I was super excited. (Yeah...I know...kale excites me. I must lead a sad sort of life...) I'd wanted to make kale chips ever since a friend posted about them on Facebook. A green leafy vegetable that preschool children devour? That's crispy and light and snack-a-licious? There must be some sort of catch, right?
Let's find out.
(On the plus side, the beautifully ruffled kale that I received proved to be quite photogenic. Intricate and organic.)
I was a bit surprised when I washed the kale. The leaves felt rubbery, not delicate like lettuce. They felt more like cabbage. I was growing ever more dubious about the kale chips.
The verdict? I need not have worried. They were light, crispy, salty perfection. Exactly as advertised. Best of all, Pretzel Boy ate a few kale chips. He then ate a few Cape Cod potato chips and mused, "How can they taste the same? One's a leaf, and one's a potato." If the pickiest of the picky will eat these chips, I'm officially calling this one a winner.
Baked kale chips
Seen on epicurious.com and smitten kitchen
1 bunch kale (approximately 12 leaves)
1 tablespoon olive oil
salt and pepper to taste
Preheat oven to 275ºF. Wash and dry kale. Cut away stalk and center rib, and cut into large pieces. Toss with olive oil, salt, and pepper. (Hint: Use much less salt than you think you need. My first batch was much too salty.)
Place in a single layer on parchment paper-covered baking sheet. Bake for 25 minutes or until crispy. Place on rack to cool.
(For a delicious variation, add a pinch of paprika and garlic powder before baking.)
Wednesday, April 13, 2011
This week's box
Here's this week's CSA box.
I'm super excited about the gorgeous head of kale that we received. I've wanted to try something for awhile now, but never got around to actually purchasing kale. That's what has been so great about the CSA. No more falling into food ruts.
Ree Drummond recently featured a delicious vegetable lasagna with squash, red bell pepper, mushrooms, and red sauce. Seeing today's squash, eggplant, and carrots made me wonder about trying a variant of her lasagna. Perhaps one alternating bechamel with tomato sauce. This sounds delicious. It also sounds like it would dirty a lot of pots. Possibilities. Possibilities...
I'm super excited about the gorgeous head of kale that we received. I've wanted to try something for awhile now, but never got around to actually purchasing kale. That's what has been so great about the CSA. No more falling into food ruts.
Ree Drummond recently featured a delicious vegetable lasagna with squash, red bell pepper, mushrooms, and red sauce. Seeing today's squash, eggplant, and carrots made me wonder about trying a variant of her lasagna. Perhaps one alternating bechamel with tomato sauce. This sounds delicious. It also sounds like it would dirty a lot of pots. Possibilities. Possibilities...
Monday, April 11, 2011
Salade composée à la niçoise
Ahhh...April in Paris. A stroll along the Seine. A chocolat chaud and people watching from an outdoor table at a Parisian café.
Sadly, an ocean separates me from Paris. However, with some of my CSA goodies, I can at least enjoy a taste of la belle vie. As soon as I saw the lettuce, Yukon Golds, and green beans in my weekly box, I knew that I'd make a variant of the classic Niçoise Salad. My variation uses roasted potatoes, beets, and turnips along with lettuce, green beans, olives, hard-boiled egg, and tuna. I'd used up my allotment of tomatoes otherwise they would have been added to the salad. Délicieuse.
In The French Chef Cookbook, Julia Child describes a salade composée as "a handsomely arranged combination salad." For her, the salad could "be the solution for what to serve at an informal spur-of-the-moment meal. The trick is to toss all of the elements separately in vinaigrette, letting some marinate for 10 to 20 minutes if they need to take on flavor. Then when you arrange your work of art, each part of it is perfectly seasoned." I took some liberties with this, drizzling my work of art with vinaigrette instead of marinating each ingredient for 10 to 20 minutes. After all, it was a school night.
Salade composée à la niçoise
1 small head of greenleaf lettuce
2 cans of tuna in olive oil
5 medium potatoes (I used Yukon Gold), cut into wedges
2 beets, cubed coarsely
1 turnip, cubed coarsely
1/2 lb. green beans, ends trimmed
6 hard-boiled eggs
cup of marinated olives, pitted
olive oil
salt and freshly ground pepper
Will's vinaigrette
3 tablespoons olive oil
1 tablespoon white wine vinegar
a pinch of salt
two pinches dried basil
one pinch dried oregano
freshly ground pepper to taste
Pour ingredients in a small, lidded jar. Shake well to combine.
Preheat oven to 400ºF. Place potatoes, beets, and turnip in a large roasting pan. Drizzle with olive oil. Salt and pepper to taste. Place in oven and roast for 45 minutes. Stir a few times during roasting.
Steam or boil green beans until barely crisp, about 5-6 minutes. Slice hard-boiled eggs, thinly. Wash, dry, and shred lettuce leaves.
Place a few handfuls of lettuce on a plate. Top with tuna, green beans, roasted root vegetables, eggs, and olives. Drizzle lightly with vinaigrette. Serve with baguette.
Sadly, an ocean separates me from Paris. However, with some of my CSA goodies, I can at least enjoy a taste of la belle vie. As soon as I saw the lettuce, Yukon Golds, and green beans in my weekly box, I knew that I'd make a variant of the classic Niçoise Salad. My variation uses roasted potatoes, beets, and turnips along with lettuce, green beans, olives, hard-boiled egg, and tuna. I'd used up my allotment of tomatoes otherwise they would have been added to the salad. Délicieuse.
In The French Chef Cookbook, Julia Child describes a salade composée as "a handsomely arranged combination salad." For her, the salad could "be the solution for what to serve at an informal spur-of-the-moment meal. The trick is to toss all of the elements separately in vinaigrette, letting some marinate for 10 to 20 minutes if they need to take on flavor. Then when you arrange your work of art, each part of it is perfectly seasoned." I took some liberties with this, drizzling my work of art with vinaigrette instead of marinating each ingredient for 10 to 20 minutes. After all, it was a school night.
Salade composée à la niçoise
1 small head of greenleaf lettuce
2 cans of tuna in olive oil
5 medium potatoes (I used Yukon Gold), cut into wedges
2 beets, cubed coarsely
1 turnip, cubed coarsely
1/2 lb. green beans, ends trimmed
6 hard-boiled eggs
cup of marinated olives, pitted
olive oil
salt and freshly ground pepper
Will's vinaigrette
3 tablespoons olive oil
1 tablespoon white wine vinegar
a pinch of salt
two pinches dried basil
one pinch dried oregano
freshly ground pepper to taste
Pour ingredients in a small, lidded jar. Shake well to combine.
Preheat oven to 400ºF. Place potatoes, beets, and turnip in a large roasting pan. Drizzle with olive oil. Salt and pepper to taste. Place in oven and roast for 45 minutes. Stir a few times during roasting.
Steam or boil green beans until barely crisp, about 5-6 minutes. Slice hard-boiled eggs, thinly. Wash, dry, and shred lettuce leaves.
Place a few handfuls of lettuce on a plate. Top with tuna, green beans, roasted root vegetables, eggs, and olives. Drizzle lightly with vinaigrette. Serve with baguette.
Friday, April 8, 2011
Sautéed swiss chard with parmesan and lemon
Isn't this gorgeous? Who wouldn't want to eat this fresh, colorful medley?
(Answer: my children)
The downside of our family pizza night tradition is that everyone gets to choose his or her own toppings. Which meant, of course, that swiss chard...even rainbow swiss chard...didn't make the cut. So instead of topping the pizza with chard, we sautéed it and served it on the side. It was quick, easy (the most labor and time intensive bit was the chopping), and delicious. My children ate it...reluctantly.
Sautéed swiss chard with parmesan and lemon
From allrecipes.com
2 tablespoons butter
2 tablespoons olive oil
1 tablespoon minced garlic
1/2 small red onion, diced
1 bunch Swiss chard, stems and center ribs cut out and chopped together, leaves coarsely chopped separately
1/2 cup dry white wine
1 tablespoon fresh lemon juice, or to taste
2 tablespoons freshly grated parmesan cheese
salt to taste (optional)
Melt butter and olive oil together in a large skillet over medium-high heat. Stir in the garlic and onion, and cook for 30 seconds until fragrant. Add the chard stems and the white wine. Simmer until the stems begin to soften, about 5 minutes. Stir in the chard leaves, and cook until wilted. Finally, stir in lemon juice and parmesan cheese; season to taste with salt if needed.
Wednesday, April 6, 2011
Inspiration
It finally feels like spring. (My allergies assert themselves enthusiastically in agreement.) The brisk wind carries a hint of warmth. I hear a cacophony of birdsong outside. And today's CSA (community-supported agriculture) box is full of fresh, good things.
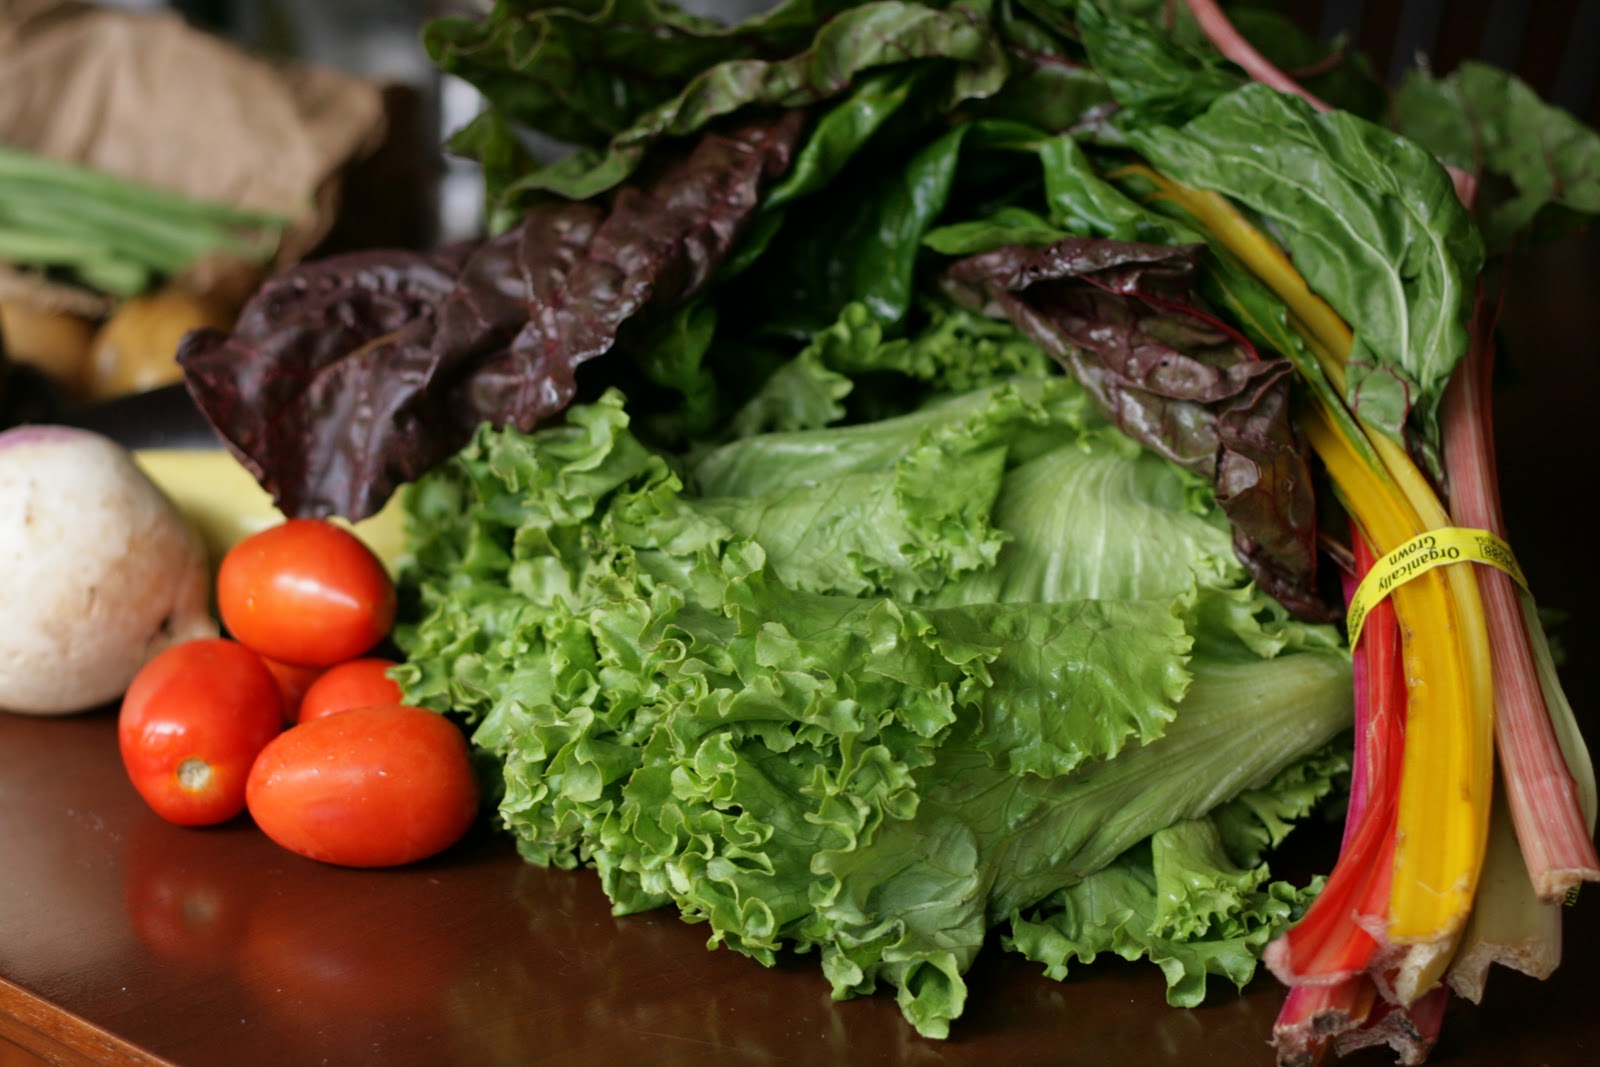
Now the fun begins. What to make? What to make? Look at the size of that greenleaf lettuce! It could provide enough salad for a small, herbivorous country. And that gorgeous rainbow chard? You'd think that my girls would absolutely love anything "rainbow," but sadly, no. Not even with bacon.
Monday, April 4, 2011
Asian lettuce wraps with ground beef and chicken
Recently, we joined a CSA.
Actually, I accidentally typed "NSA." No, I haven't joined the NSA. Of course not. I don't think that the recipes, decorating ideas, and all the other random things cluttering my head would be of any help in bolstering our nation's security. Though some Farrow & Ball paint colors might really add some sophistication to the NSA's government-issued drab rooms. After all, what better way to calm a terrifically stressful environment than through the use of color? Plus Farrow & Ball are British, and the British are our friends.
(Did I just get entered onto a government watch list somewhere?)
Anyway...as I was saying, we recently joined a CSA. This is our first time, and I wasn't sure what to expect. What we've gotten so far are boxes beautifully packed with amazingly fresh, gorgeous produce. It's like Christmas morning once a week here. A very vegetarian Christmas. And it has been lots of fun to play with new foods that I'd never have purchased.
Every week, we've received a huge, beautiful head of lettuce. And every week, I think to myself, "These would be perfect for lettuce wraps." So finally, I made them. Fast and flavorful.
Asian lettuce wraps
1 head of lettuce
8-10 ounces of dried rice vermicelli noodles
Wash and dry lettuce leaves. Set aside.
Bring large pot of water to a boil. Then turn off the heat, and add rice noodles to the water. Stir occasionally until soft (about 4-5 minutes). Then drain and rinse with cool water.
Place a small amount of noodles into each leaf. Top with the filling of your choice.
Asian lettuce wrap: ground beef filling
1 lb ground beef
1 tablespoon vegetable oil
1/2 onion, diced fine
2-3 cloves garlic, minced
2 teaspoons fresh ginger, minced
1 tablespoon soy sauce
1/4 cup Hoisin sauce
1 tablespoon rice vinegar
2 teaspoons sesame oil
Cook ground beef in a skillet until well browned. Drain beef and remove from skillet. Add oil to the pan and sauté onions, garlic, and ginger until they become tender. Add remaining ingredients to the pan along with cooked beef and heat through.
Asian lettuce wrap: chicken filling
2 bone-in chicken breasts
1-2 cloves garlic, minced
1 teaspoon fresh ginger, minced
1/4 cup soy sauce
2 teaspoons sugar
1 tablespoon rice vinegar
1-2 teaspoons chile paste with garlic
Place chicken breasts in a large sauce pan and cover with water. Bring to a boil and simmer, covered, until chicken is cooked through. Let chicken cool. Discard skin, remove meat from bones, and chop the meat into small pieces.
In a small sauce pan, sauté garlic and ginger in a small amount of oil for about 2 minutes. Add liquid ingredients and stir over heat until all of the sugar is dissolved. Add chopped chicken to the pan and stir thoroughly to distribute sauce.
Actually, I accidentally typed "NSA." No, I haven't joined the NSA. Of course not. I don't think that the recipes, decorating ideas, and all the other random things cluttering my head would be of any help in bolstering our nation's security. Though some Farrow & Ball paint colors might really add some sophistication to the NSA's government-issued drab rooms. After all, what better way to calm a terrifically stressful environment than through the use of color? Plus Farrow & Ball are British, and the British are our friends.
(Did I just get entered onto a government watch list somewhere?)
Anyway...as I was saying, we recently joined a CSA. This is our first time, and I wasn't sure what to expect. What we've gotten so far are boxes beautifully packed with amazingly fresh, gorgeous produce. It's like Christmas morning once a week here. A very vegetarian Christmas. And it has been lots of fun to play with new foods that I'd never have purchased.
Every week, we've received a huge, beautiful head of lettuce. And every week, I think to myself, "These would be perfect for lettuce wraps." So finally, I made them. Fast and flavorful.
Asian lettuce wraps
1 head of lettuce
8-10 ounces of dried rice vermicelli noodles
Wash and dry lettuce leaves. Set aside.
Bring large pot of water to a boil. Then turn off the heat, and add rice noodles to the water. Stir occasionally until soft (about 4-5 minutes). Then drain and rinse with cool water.
Place a small amount of noodles into each leaf. Top with the filling of your choice.
Asian lettuce wrap: ground beef filling
1 lb ground beef
1 tablespoon vegetable oil
1/2 onion, diced fine
2-3 cloves garlic, minced
2 teaspoons fresh ginger, minced
1 tablespoon soy sauce
1/4 cup Hoisin sauce
1 tablespoon rice vinegar
2 teaspoons sesame oil
Cook ground beef in a skillet until well browned. Drain beef and remove from skillet. Add oil to the pan and sauté onions, garlic, and ginger until they become tender. Add remaining ingredients to the pan along with cooked beef and heat through.
Asian lettuce wrap: chicken filling
2 bone-in chicken breasts
1-2 cloves garlic, minced
1 teaspoon fresh ginger, minced
1/4 cup soy sauce
2 teaspoons sugar
1 tablespoon rice vinegar
1-2 teaspoons chile paste with garlic
Place chicken breasts in a large sauce pan and cover with water. Bring to a boil and simmer, covered, until chicken is cooked through. Let chicken cool. Discard skin, remove meat from bones, and chop the meat into small pieces.
In a small sauce pan, sauté garlic and ginger in a small amount of oil for about 2 minutes. Add liquid ingredients and stir over heat until all of the sugar is dissolved. Add chopped chicken to the pan and stir thoroughly to distribute sauce.
Subscribe to:
Posts (Atom)